
Win STORM Help - Set Up Monitoring


Win STORM is in beta stage. While we're debugging the application, please report any bugs you find through our Contact form.
The Set Up Monitoring page lets you enable, disable and configure remote and local monitoring.
Help content index:
Overview of the Set Up Monitoring page
This page lets you configure the way your computer is monitored, either remotely and locally as well.
Set up how frequently a system scan is performed and which alerts you want to receive.
The system scan that is performed is the same you get on the Diagnose and repair page.
You can set alerts file changes, registry changes, service changes, hardware temperature an much more. We plan to keep adding alert types in the future.
This page contains two tabs: Remote monitoring, and Local monitoring. Switch to the desired tab at the top.
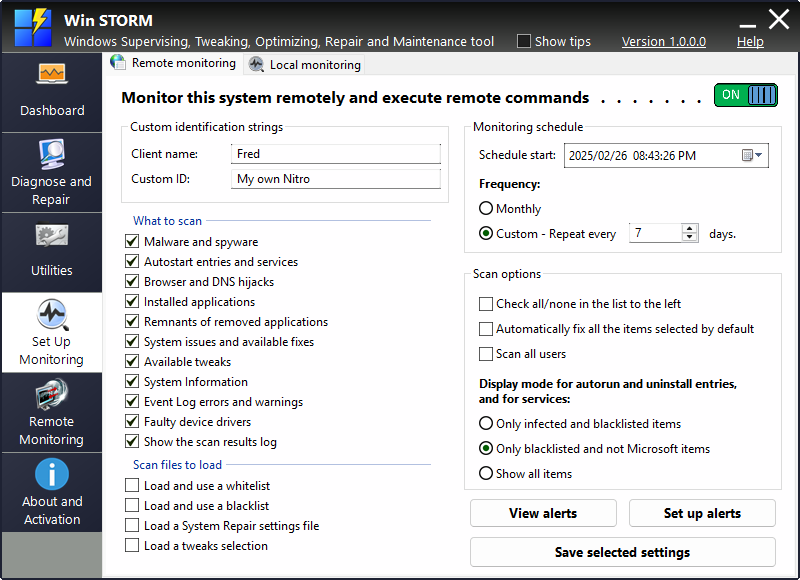
Remote monitoring
If you enable remote monitoring on a computer, you can control it from the Remote monitoring Win STORM page.
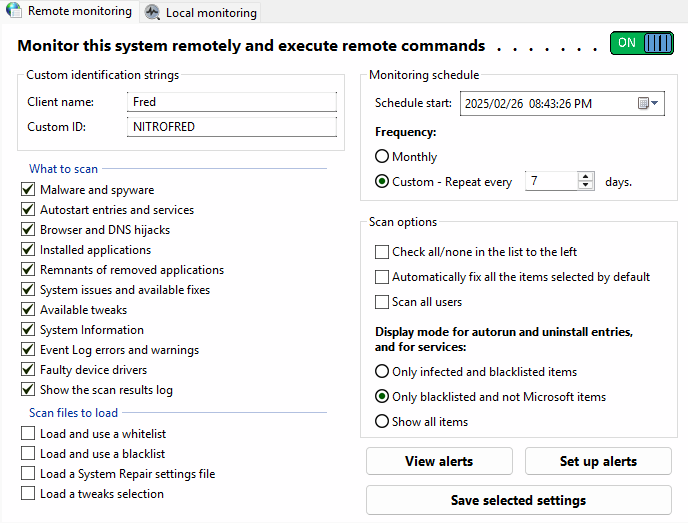
Enter the desired Client name and Custom ID in the Custom identification strings group. This data is intended to help you identify this computer among others in a list.
Check the areas you want to be scanned, under What to scan. Also check the files you want to be loaded by the scanner, under Scan files to load.
In the Monitoring schedule group, click the Schedule start date picker to select the desired date and time for the first scan.
Then indicate how frequently you want the scan to be repeated: Select Monthly to scan every day of the month you previously selected in the date picker. Or select Custom and indicate the desired frequency. The default is 7 days.
Next, in the Scan options group, tick the desired options to enable them.
- Check all/none in the list to the left - Use this checkbox to help you quickly select all or none items in the What to scan list.
- Automatically fix all items selected by default - Before using this option, perform a scan manually, and be sure to whitelist any items that you do not want to be automatically fixed.
- Scan all users - This option controls whether to perform the scan for all users, or just the current user.
Then select the desired display mode for Autorun and Uninstall entries, and for Services.
Only infected and whitelisted items
- Only infected and blacklisted items - Select this option if you're only searching for malware and your own blacklisted items.
- Only blacklisted and non Windows items - This is the default option. Genuine Windows services, autostart entries and desktop applications are hidden.
- Show all items - If you select this option, no filtering is done, except for your white listed items.
Click Set up alerts, and configure the desired alerts. If you prefer to view previous alerts created in this computer, click View alerts.
When ready, click the toggle button at the top to enable/disable Remote monitoring, or simply press Save selected settings, if you don't want to change the current state.
Local monitoring
If you enable local monitoring, you can periodically get alerts and automatically perform system scans.
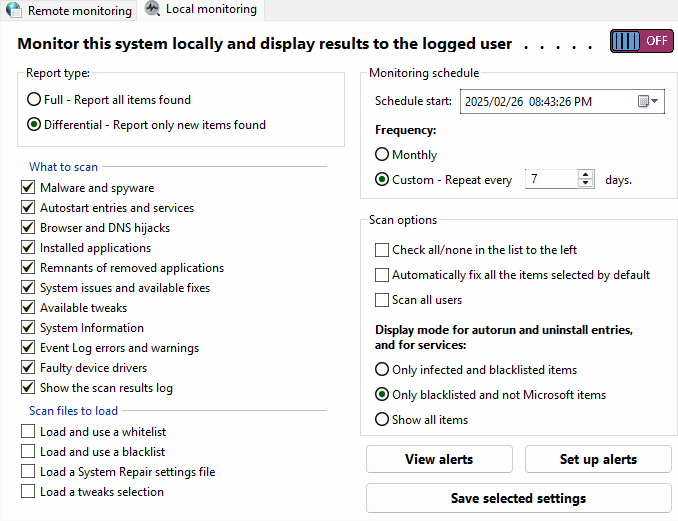
Select the desired setting in the Report type group. If you select Full - Report all items found, Win STORM will not filter the results from the previous scan, otherwise it will, and only new items are displayed. This can help keep things simple, and you can always perform a full scan on demand.
Check the areas you want to be scanned, under What to scan. Also check the files you want to be loaded by the scanner, under Scan files to load.
In the Monitoring schedule group, click the Schedule start date picker to select the desired date and time for the first scan.
Then indicate how frequently you want the scan to be repeated: Select Monthly to scan every day of the month you previously selected in the date picker. Or select Custom and indicate the desired frequency. The default is 7 days.
Next, in the Scan options group, tick the desired options to enable them.
- Check all/none in the list to the left - Use this checkbox to help you quickly select all or none items in the What to scan list.
- Automatically fix all items selected by default - Before using this option, perform a scan manually, and be sure to whitelist any items that you do not want to be automatically fixed.
- Scan all users - This option controls whether to perform the scan for all users, or just the current user.
Then select the desired display mode for Autorun and Uninstall entries, and for Services.
Only infected and whitelisted items
- Only infected and blacklisted items - Select this option if you're only searching for malware and your own blacklisted items.
- Only blacklisted and non Windows items - This is the default option. Genuine Windows services, autostart entries and desktop applications are hidden.
- Show all items - If you select this option, no filtering is done, except for your white listed items.
Click Set up alerts, and configure the desired alerts. If you prefer to view previous alerts created in this computer, click View alerts.
When ready, click the toggle button at the top to enable/disable Local monitoring, or simply press Save selected settings, if you don't want to change the current state.
Set up alerts
Win STORM alerting system already supports many different alert types and we're constantly adding more. Please do tell us about alert types that should be added.
The dialog box that lets you set up remote or local alerts is shown in the picture below.
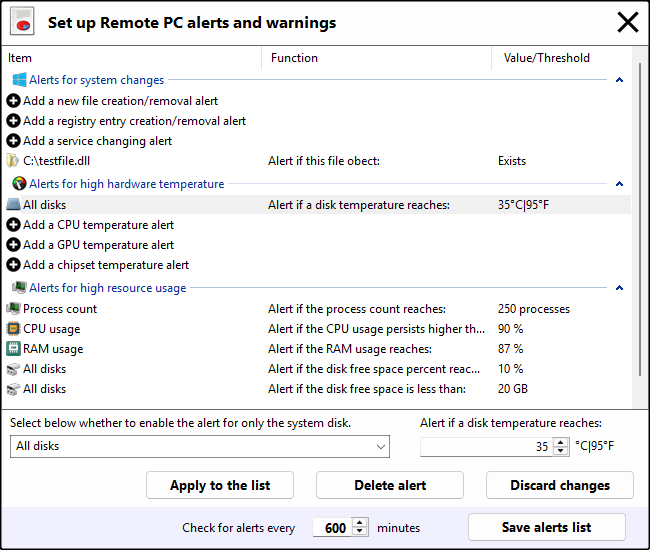
The list contains three groups:
- Alerts for system changes - Supports alerts for file creation/removal, registry entry creation/removal and service changes.
- Alerts for high hardware temperature - Supports alerts for high disk temperature. We're adding support for CPU, GPU and chipset temps.
- Alerts for high resource usage - Supports alerts for high number of processes, high CPU usage, high RAM usage, and low disk space, in percentage or in GB.
Select the desired item in the list. If you want to add a new alert, select the corresponding item with a "plus" sign. Otherwise, select the item you want to modify or remove. The list shrinks vertically, and some controls appear at the bottom which let you set the desired data for the selected alert.
When you're done, click Apply to the list, to write the changes you've made on the selected alert to the list. This will not save the alerts list yet, See below.
To delete an existing alert instead, press Delete alert. Obviously, this is only valid for existing alerts.
If you don't want to apply any changes to the selected alert, press Discard changes instead.
Set how frequently the application should check for alerts and warnings, in the text input field after "Check for alerts every". This is the interval, in minutes that Win STORM waits between each time it checks for new alerts.
Once you're done, press Save alerts list. This will apply all the changes you've made to all the list.
To discard any changes to the alerts list, close this dialog box by clicking the X button ant the top right corner of the dialog box.
View/Manage Alerts
Every time Win STORM displays alerts automatically, only the latest ones are shown. However, alerts are cumulated, saved to a text file so you can review them later. This feature lets you view and manage cumulated alerts and warnings.
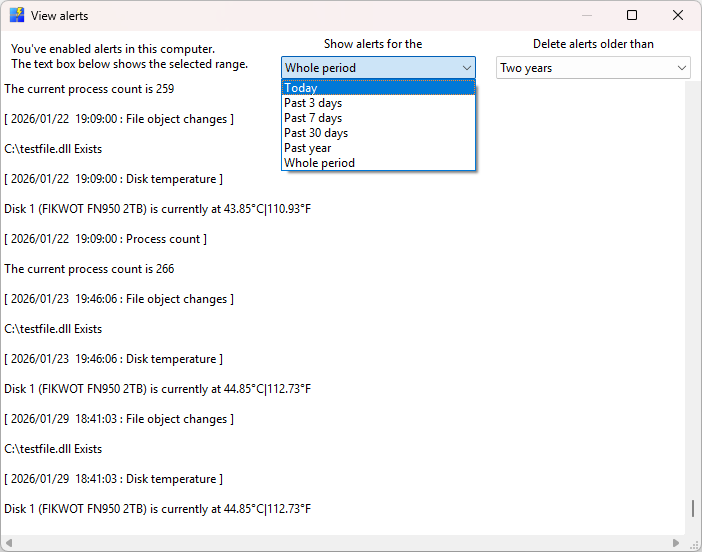
Select the period for which you want to see alerts and warnings for, in the top middle drop down box.
To delete old alerts, select the desired period to delete, in the top right drop down box.
Once you're done, close this dialog box.
