
Win STORM Help - Remote Monitoring


Win STORM is in beta stage. While we're debugging the application, please report any bugs you find through our Contact form.
The Remote monitoring page is where you manage and control your remote PCs, send remote commands, execute remote scripts, access remote scans and much more.
Help content index:
Overview of the Remote monitoring page
In this page you can manage and control your remote PCs. To get started, log in to your account in the Account login tab.
Once you're logged in, the Monitored computers tab is created and populates a list containing the remote PCs you're currently managing.
You can then connect to one of the listed PCs and perform all sorts of tasks, including access the system scans and fix items just like if you were physically worling on the remote PC. Other tasks include taking remote desktop control, run all sorts of scripts remotely, view remote alerts and much more.
Account login
This tab lets you log in to your RMM account. This is the first step you need to take in order to start controlling your renote computers.

Enter your email address and password in the corresponding field. Tick the Show checkbox if you want your password's characters to be displayed.
You can reset your password anytime by clicking Forgot your password, but keep in mind that will prevent your remote PCs from reconnecting.
Tick Save password in this computer if you want to skip typing your password the next time you log in on this computer.
When ready, click Log into your RMM account. If your login is successfully, the Monitored computers, Remote PC management and Monitoring scans tabs are created, and the list under the Monitored computers tab is populated with your associated PCs.
Also, the Reload PCs and Disconnect buttons at the top of the frame become active. Click Reload PCs to rebuild the remotely monitored computers list (for instance, if you add a new monitored PC to your account. Click Disconnect if you're done with this page and want to exit Remote Monitoring.
Monitored computers tab
The monitored computers tab of the Remote monitoring Win STORM page lets you manage and control the computers associated with your account, set each computer's details, and remove them from your account.
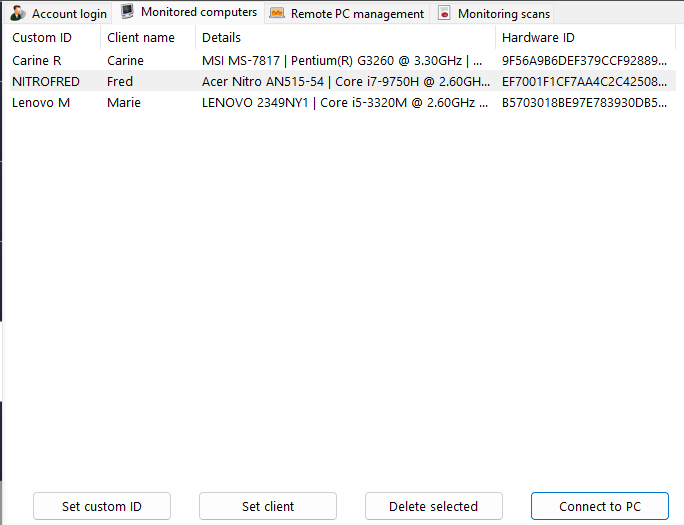
Select a computer in the list. This is your first step. The buttons at the bottom become active.
Click the button that corresponds to the action you want to take.
Set custom ID - Change the custom ID associated with the selected computer. The custom ID is a free text string intended to help you identify a computer.
Set Client - Change the client name associated with the selected computer. The Client name is usually the computer owner's name, but it can be whaterver you want.
Delete selected - Remove the selected computer from the monitored PCs list. If you do this, the remote computer is disconnected, and will no longer be accessible. Note that you can only add a new computer from itself.
Connect to PC - This lets you connect to the selected computer, and manage it from the Remote PC management and Monitoring scans tabs.
Remote PC management tab
Once you connect to a remote computer, this tab shows associated details, and lets you perform actions on the remote machine.
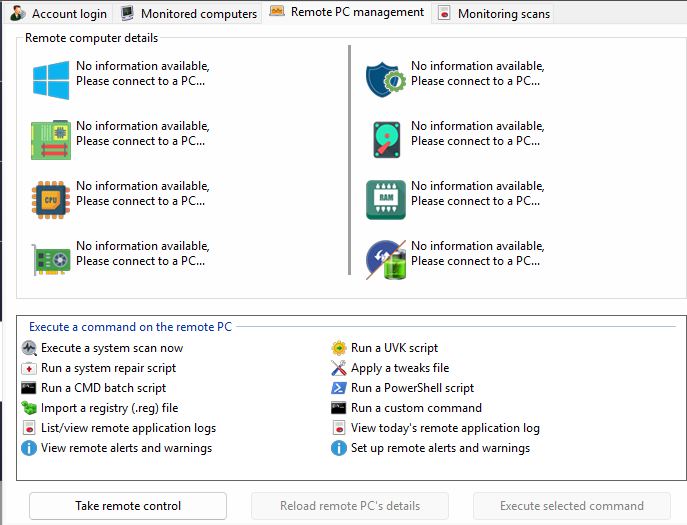
The top pane shows dashboard information about the remote machine. The bottom list contains actions to execute on the remote PC.
- Execute a system scan now - This lets you start a custom scan in the remote PC. You can choose which areas to scan.
- Run a UVK script - This lets you send a UVK script to the selected PC and execute it remotely.
- Run a system repair script - This lets you send a UVKSR file to the selected PC and execute it remotely.
- Apply a tweaks file - This lets you send a uvktweaks file to the selected PC and execute it remotely.
- Run a CMD batch script - This lets you send a batch file to the selected PC and execute it remotely.
- Run a PowerShell script - This lets you send a PS1 file to the selected PC and execute it remotely.
- Import a registry (.reg) file - This lets you send a REG file to the selected PC and merge it remotely.
- Run a custom command - This lets you let a custom command remotely and optionally send a file that is represented as "ScriptPath", in the command.
- List/View remote application logs - This displays a list of the remote application logs and lets you view the selected one, delete them one by one, or clear them all. Application logs are INI-type files that contain the different actions executed by the application, daily.
- View today's application log - This will simply display today's remote application log.
- View remote alerts and warnings - This lets you view and manage the alerts and warnings in the remote computer.
- Set up remote alerts and warnings - This lets you configure the alerts and warnings in the remote computer.
Select one of those actions and click Execute selected command. Usually it only takes a few seconds to send the command over.
Press Take remote control to use a remote desktop app and take control of the remote computer. In the current setup, RustDesk is executed in the remote computer, and a screenshot of the ID and password is transmitted and displayed in the local desktop. Rustdesk is then executed locally, side by side with the remote screenshot. Type in the remote credentials in the local RustDesk application and click Connect.
We're working on building our own remote desktop app, to make the connection easier.
Monitoring scans tab
The monitoring scans tab lets you load system scans from the selected remote computer, and fix items remotely.
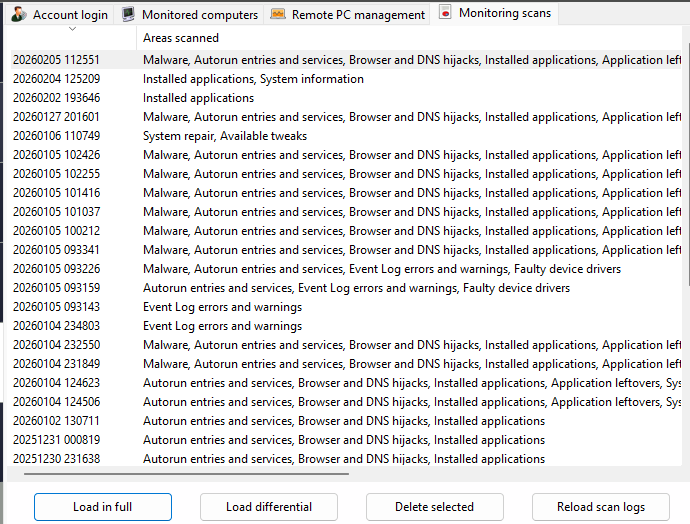
To get started, select a scan log in the list. The buttons at the bottom become active. At this point, you can either load the selected log in full, which will display all the entries found during the scan, or load it differential, filtering the results present in a previous log.
If you click Load differential, a overlayed dialog box will let choose the filtering log. Otherwise, if you click Load in full, the selected log is fully loaded. The selected log is downloaded from the remote computer and displayed in the System scan module.
To delete a scan log in the remote computer, select it in the list, and click Delete selected.
To reload the list of system scan logs in the remote computer, press Reload scan logs.
