
Win STORM Help - Diagnose and Repair


Win STORM is in beta stage. While we're debugging the application, please report any bugs you find through our Contact form.
In this page:
Overview of the Diagnose and Repair page
Overview of the Diagnose and Repair page:
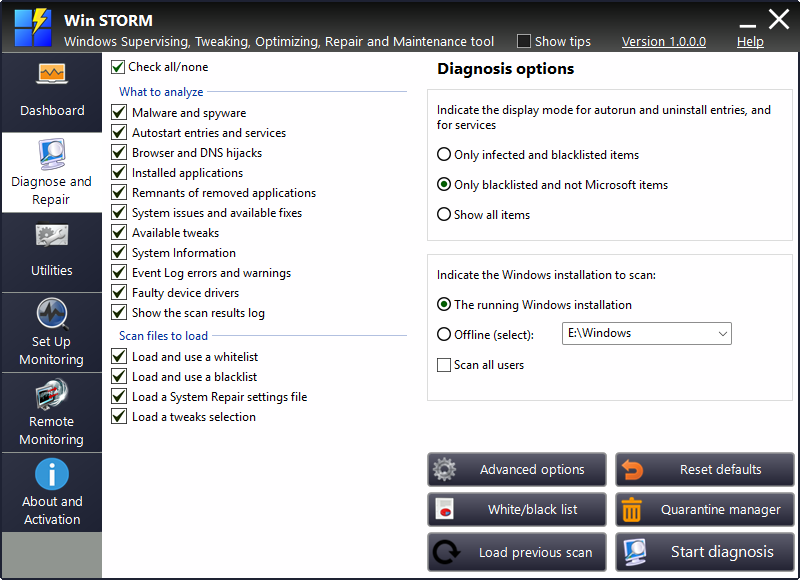
The Diagnose and Repair page lets you perform a system scan and fix the result's listed issues. You can scan the current (online) windows OS, or an offline OS located in an external or internal drive. The Diagnose and Repair page also allows you to load a previous scan, restore quarantined items, manage whitelists and more.
Win STORM is all about diagnosis, so the same system scan is also performed by our RMM system regularly, which helps computer technicians and IT professionals manage and monitor their remote computers.
Perform a system scan
To perform a system diagnosis, start by selecting the areas you want to scan in the left list, under the What to analyze group. You can click the Check all/none checkbox to apply the corresponding state to all the items in the list.
Then indicate whether you want to load a whitelist file, a blacklist file, a System repair settings file, and a tweaks file, under the Scan files to load group. Note that you can set those files up before starting the scan.
The next step is to select your preferred filtering option. This option is only valid for the Autostart entries, Services and Installed desktop apps lists. It will not have any effect on the results from other lists.
- Show only infected and blacklisted items - Select this option if you're only searching for malware and your own blacklisted items.
- Show only blacklisted and non Windows items - This is the default option. Genuine Windows services, autostart entries and desktop applications are hidden.
- Show all items - If you select this option, no filtering is done, except for your white listed items.
Note: Regardless of which option you select, white listed items are always hidden, and blacklisted items are always displayed and checked.
The next thing to do is select the Windows OS to scan.
If you want to scan the current, online Windows OS, keep the option The running Windows installation selected. Otherwise, click Offline (select) and then select, in the dropdown box to the right, the desired offline Windows OS drive to scan.
Tick Scan all users, if you wish to scan all the users in the current Windows installation. This option is not valid for offline system scans, where all users are always scanned.
Finally, press Start diagnosis to begin scanning. The Scan & repair Window is displayed, showing the scan's progress and results. Click here to go the corresponding help page.
Click Reset defaults to restore all the controls to their default state to their default state.
Load a previous scan
Instead of performing a new scan, you can load a previous one. If you think your system hasn't changed much since a previous scan, this option can save loads of time and resources. A loaded scan shows the same contents it showed when it was executed for the first time.
To do so, click Load a previous scan. A dialog box similar to the one in the screenshot below is displayed.
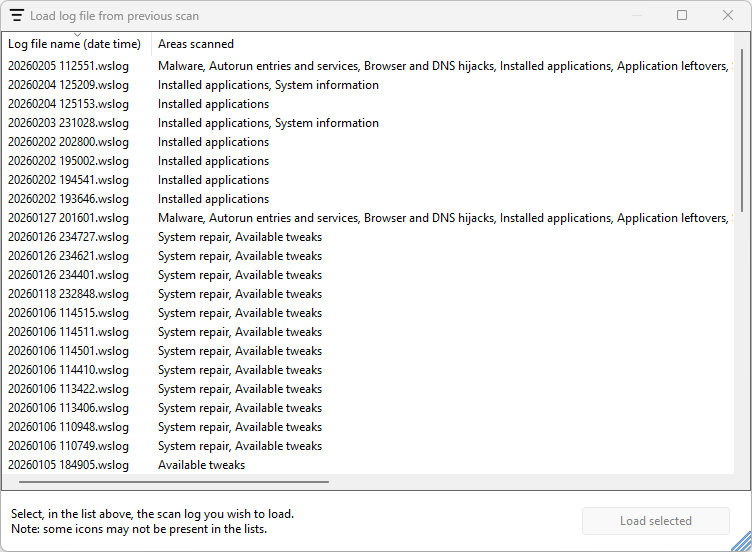
Select, in the list, the log file corresponding to the scan you wish to load. The log's file name (1st column) contains the date and time at which the scan was performed, in the format YYYYMMDD hhmmss.
The second column, Areas scanned, displays the areas that were selected for scanning, separated by a coma. The information provided in each line should help you to identify the scan log file you want to load.
Select the desired log's line and press Load selected. The Scan & repair Window is displayed, showing the loading progress and results. Click here to go the corresponding help page.
Advanced options
This button lets you set up the configuration files that will be loaded by the scan. These files can be easily imported from UVK to Win STORM.
When you click this button, a dialog box similar to the one in the picture below is displayed.

Indicate the desired files to load by selecting them in the drop down box. Those are the files that will be loaded. If they do not exist, they will be created.
To import data from other files to the selected files, press the corresponding Add... button, to the right of the drop down box. By default, the data will be merged with any data already in the destination file. If you prefer the data to be replaced instead, tick the Replace checkbox, at the bottom.
Once you're done click Apply and save. Or if you want to discard the changes, just close this dialog box.
Delete old scan logs
When you click this button, a dialog box similar to the one in the picture below is displayed, showing a list of the existing scan logs. This feature lets you delete existing scan log files. Note that once they are deleted, those files can not be recovered. Scan logs are JSON files which contain all the details gathered during the scan.
The first column shows the log's file name, which in turn contains the date and time the scan was performed. The second column shows the areas that were scanned.
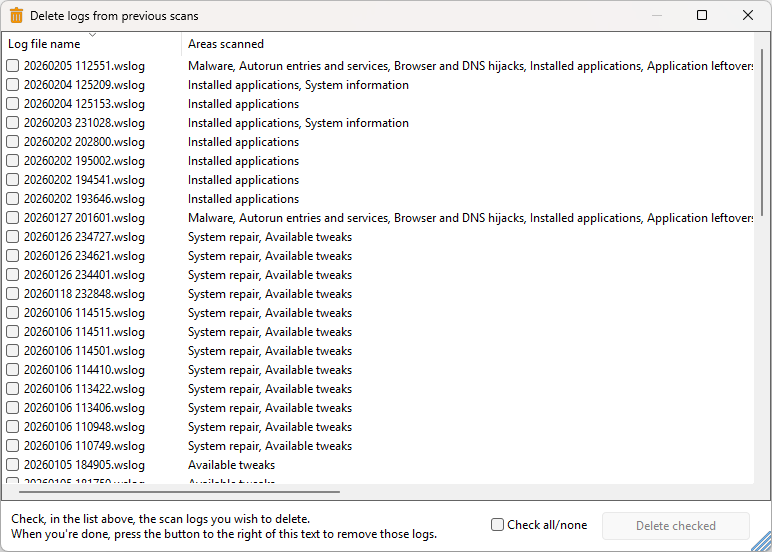
Tick the items you want to remove, using the information in the list to help you with the selection. Items with a check mark will be removed.
Click Check all/none to easily select all the items, or none, according the checkbox's state.
Once you complete your selection, click Delete checked. The selected scan logs are deleted and removed from the list.
Once you have deleted the desired logs, close this dialog box.
View application logs
This feature lets you view and manage the application's logs. These logs contain actions you performed using Win STORM. One log file is created every day. By default, the contents of the last log are displayed. See below how to load other logs.
To use this feature, click View application logs. A dialog box similar to the one in the picture below is then displayed. The log files are created in the INI file format, but their contents are slightly changed before being printed in this dialog box, making them more readable.
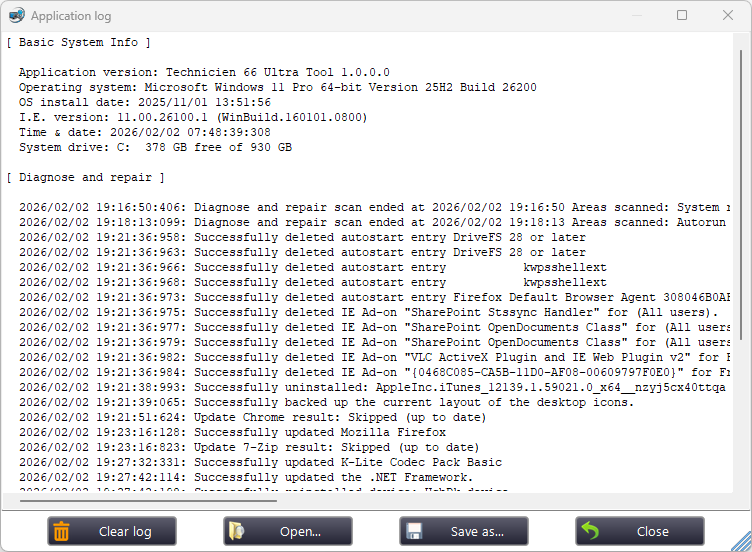
At the bottom of the dialog box, below the text box, you have four buttons:
- Clear log - Clear the contents of the text box, leaving only the Basic System Info section.
- Open... - Clicking this button opens a dialog box that lets you select a different log to load the contents from, instead of the current one.
- Save as... - This allows you to save the current log file to the location you choose.
- Close - Closes this dialog box.
White/black list
When you perform a system scan, you may want some items to be automatically selected and never filtered out, while others you may not want them to be displayed at all. Win STORM allows you to easily white/black list items from the System scan module.
The Whitelist/Blacklist manager lets you view and manage those items. Whitelisted items are always discarded, while blacklisted items are always displayed, and automatically selected.
By default, the Whitelist tab is selected. Switch to the Blacklist tab if you want to view and manage blacklisted items instead.
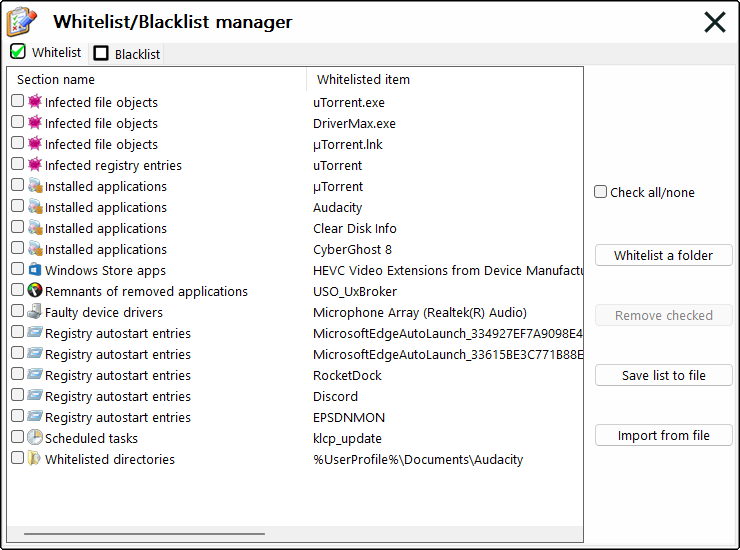
Click Whitelist a folder to add a directory to the list. When you whitelist a directory, all its contents are recursively whitelisted. This option is only available on the Whitelist tab.
Tick any items you want to remove from the current list. Click Check all/none to tick all the items in the current list, or none, respectively. When ready, you can click Remove checked. This will permanently remove the selected items from the current list.
Click Save list to file to export the current list to the file you indicate next.
Click Import from file, to load a list from the file you indicate next.
When you're done working on your white and black lists, close this dialog box.
Quarantine manager
The Quarantine manager lets you restore or permanently remove file objects and registry entries you have previously deleted from the System scan module.
When you click this button, a dialog box similar to the one in the picture below is displayed.
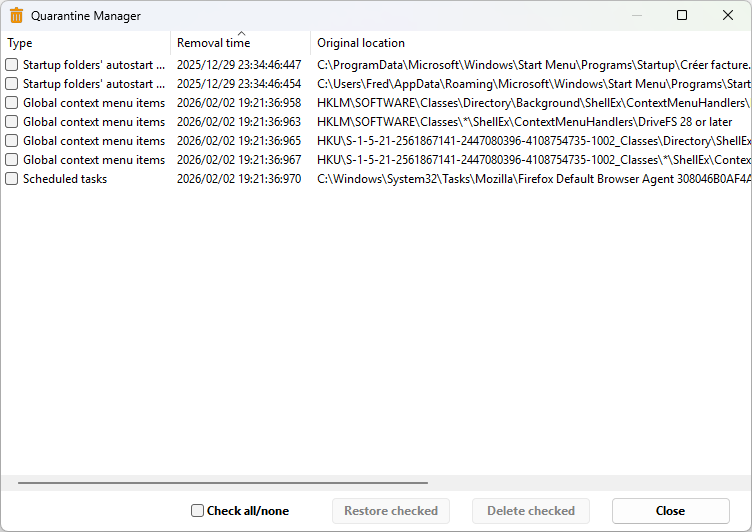
Tick, in the list, the items you want to restore or permanently delete. You can click Check all/none to help you with the selection.
Click Restore checked to restore the ticked items.
Click Delete checked to permanently delete the ticked items.
Click Close to exit this feature.
